When it comes to bathroom renovations, one of the most impactful upgrades you can make is installing a new vanity. It’s where functionality meets design, offering both storage and visual appeal. But many homeowners hesitate with one lingering question: Is it easy to install a bathroom vanity? The answer is yes—with the right preparation, tools, and guidance, even a moderately experienced DIYer can complete this project successfully.
In this guide, we’ll walk you through everything from selecting the right vanity to step-by-step installation and finishing touches. Whether you’re replacing an outdated unit or outfitting a new space, this article will equip you with the knowledge to do it right.
Step 1: Choosing the Right Vanity – Where Success Begins
Before grabbing a wrench or drill, the first—and arguably most critical—step is selecting a vanity that suits both your space and your lifestyle. The design and type of vanity you choose will directly impact the ease of installation.
Size and Style Matter
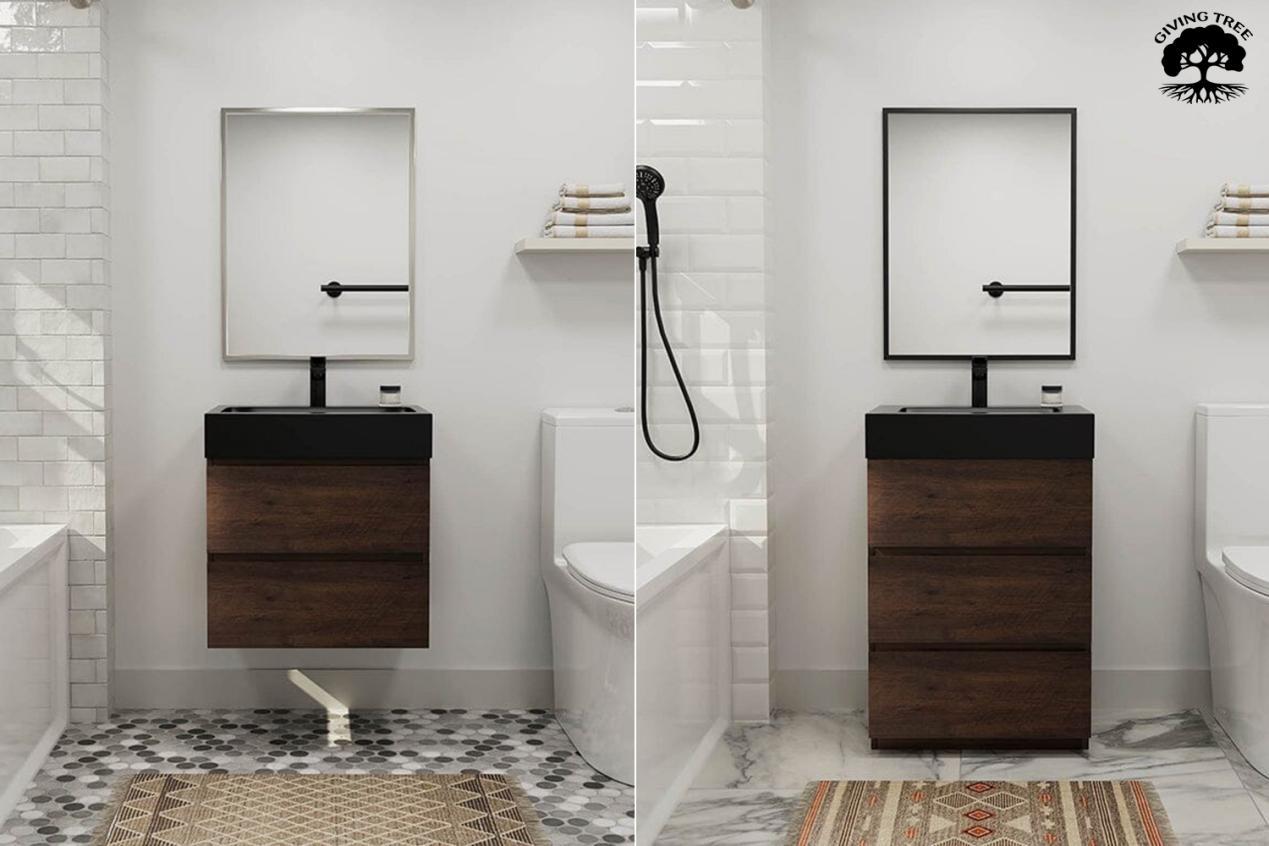
For smaller bathrooms or powder rooms, a wall-mounted vanity can be a smart choice. It creates the illusion of more space and makes floor cleaning easier. Larger bathrooms, on the other hand, can accommodate freestanding vanities, which offer increased storage and design variety.
Be sure to measure the available space carefully—consider width, depth, and height. Take into account door swing, plumbing access, and how the vanity will align with mirrors or lighting fixtures.
Functionality and Storage
Think about your daily routine. Do you need extra drawers for hair tools and toiletries? Would double sinks make mornings smoother for your family? A good vanity should support your lifestyle, not complicate it.
Pre-Assembled vs. Ready-to-Assemble
Vanities typically come in two formats:
- Pre-assembled: These arrive ready to install and save significant time, though they’re often more expensive.
- Ready-to-assemble (RTA): These require some building at home but are budget-friendly and ideal for DIY enthusiasts.
Your choice depends on your skill level and how much time you’re willing to invest.
Step 2: Gather the Tools You’ll Need
Installing a vanity doesn’t require a full contractor’s toolkit, but a few basic tools are essential:
- Measuring tape
- Level
- Adjustable wrench
- Power drill and bits
- Screwdrivers
- Utility knife
- Silicone caulk or plumber’s putty
- Stud finder
- Plumber’s tape
Having these on hand before you start will save frustration mid-project.
Step 3: Measure and Plan the Layout
Accurate measurements and layout planning are crucial to a smooth installation. Confirm the height and width of the vanity space, as well as plumbing access points.
If you’re installing a wall-mounted vanity, use a stud finder to locate framing inside the wall—you’ll need solid anchor points to support the weight. Double-check that the floor is level and the wall is plumb. Any uneven surfaces can create complications later.
Also take note of electrical outlets, baseboards, or trim that may need adjustment.
Step 4: Shut Off Water Supply and Remove the Old Vanity
Before removing the old vanity, shut off both the hot and cold water supply valves located under the sink. If your vanity doesn’t have local shut-offs, you’ll need to turn off the main water supply for the house.
Disconnect the water supply lines and drain trap with an adjustable wrench. Once all plumbing is removed, unscrew or pry the vanity from the wall and floor. Be prepared for minor wall or floor damage—this is common and easily patched.
Clean the area thoroughly to prepare for the new installation.
Step 5: Install the New Vanity – Step by Step
Now for the fun part: installing your new vanity. Here’s a breakdown of the process:
A. Position and Secure the Base
Move the vanity into place and make sure it’s centered and level. For wall-mounted vanities, align the brackets or back panel with wall studs and fasten with heavy-duty screws. Use a level to confirm the unit is perfectly horizontal before securing.
Freestanding vanities should sit flush against the wall and floor. Use shims if necessary to level the base before anchoring.
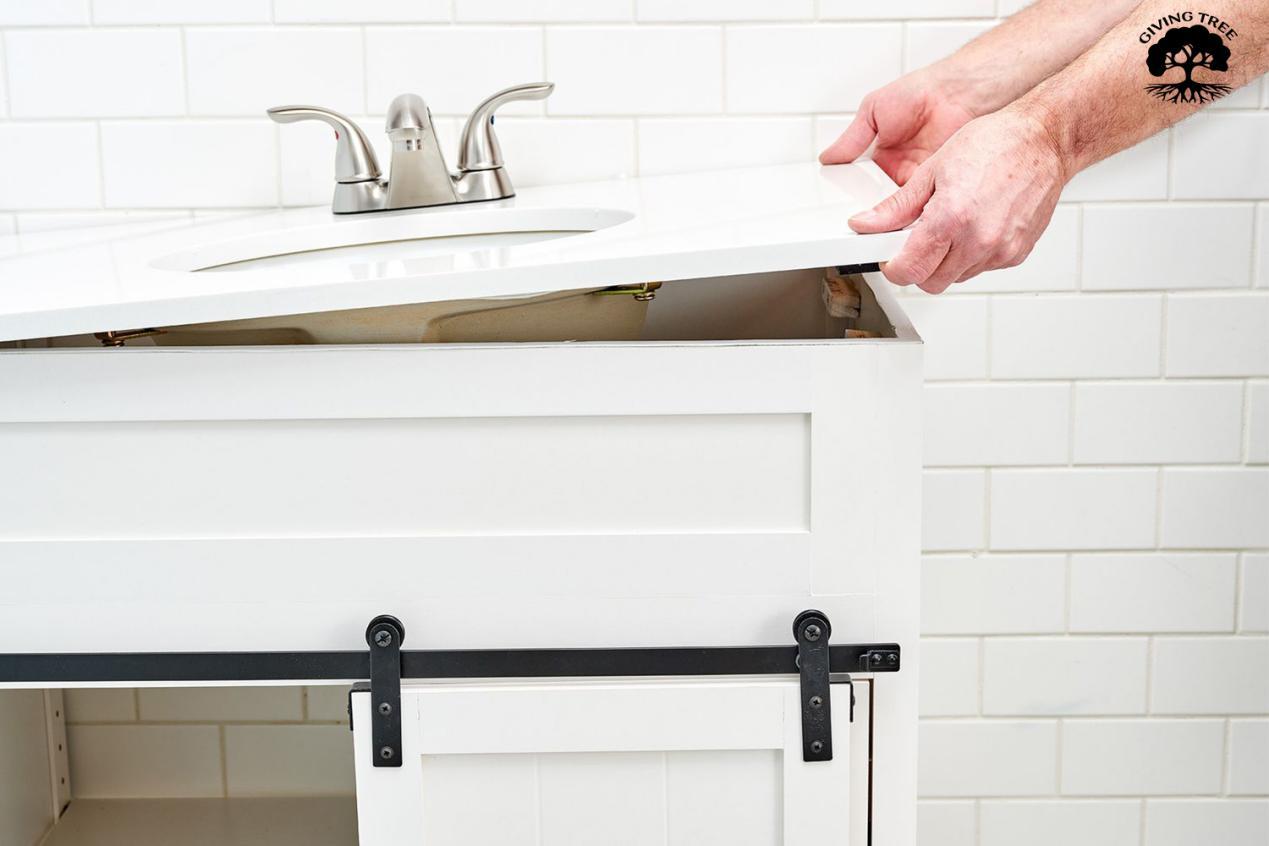
B. Attach the Vanity Top and Sink
If your vanity top and sink are separate pieces, apply a bead of silicone caulk around the top edge of the vanity base and gently press the countertop in place. Wipe away any excess before it sets.
Install the faucet and drain assembly according to the manufacturer’s instructions before attaching the top to the base. This is usually easier than installing after the top is secured.
C. Reconnect Plumbing
Wrap plumber’s tape around threaded joints and reconnect the water supply lines and P-trap. Turn the water valves back on and check for leaks at all connections.
If you notice drips, don’t panic—tighten the fittings gently or reapply sealant. A dry test run ensures everything works before you seal the unit.
Step 6: Seal the Edges and Finish the Look
Apply a clean bead of silicone caulk where the vanity meets the wall and floor. This helps prevent water seepage and gives your installation a polished, professional look.
If needed, touch up the wall with paint or replace baseboards and trim for a seamless finish.
Step 7: Choose a Style That Elevates Your Bathroom
A well-chosen vanity isn’t just practical—it’s a design statement. Modern bathrooms often favor sleek, minimalist wall-mounted vanities, while traditional spaces may feature ornate freestanding models with rich wood finishes and detailed cabinetry.
Further Reading: Floating vs. Freestanding Vanity: Which One Fits You Best?
At Giving Tree, we offer a curated collection of vanities in various styles, materials, and finishes—from ultra-modern matte black to warm natural oak. You’ll find options that match your taste, whether your style is classic, contemporary, or somewhere in between.
Step 8: Material Quality Matters
Bathrooms are high-moisture environments, so your vanity needs to stand up to humidity and frequent use. Look for materials like:
Moisture-resistant MDF or plywood
Laminated or sealed wood finishes
Porcelain, quartz, or marble countertops
Rust-proof hardware and hinges
All Giving Tree vanities are crafted using premium-grade, durable materials engineered for long-term performance, even in steamy environments.
So, Is It Easy to Install a Bathroom Vanity?
In summary: yes—it can be surprisingly easy. Installing a bathroom vanity is a manageable home project if you plan properly, take accurate measurements, and follow best practices. With the right tools and a bit of patience, most homeowners can complete the job in a few hours.
But if you’re still unsure—or simply want a smoother, worry-free experience—Giving Tree is here to help. Not only do we provide high-quality, stylish vanities for every type of bathroom, but we also offer unmatched customer support and installation guidance to make your renovation seamless.
From purchase to placement, Giving Tree ensures you’re never left guessing.
So the next time someone asks you, “Is it easy to install a bathroom vanity?” you can confidently say:
“Yes—especially when you choose Giving Tree.”
References: Complete Bathroom Vanity Installation Guide
Leave A Comment